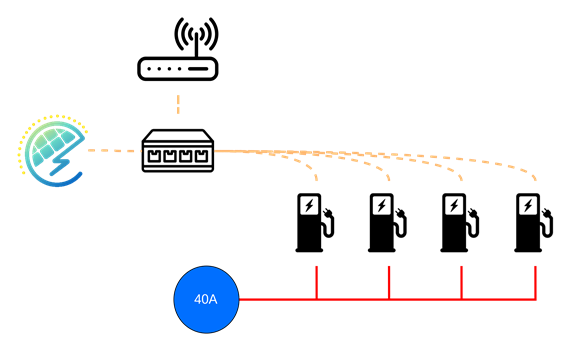
This Installation Guide will explain a Edge installation using a simple example. For this simple Edge installation, we will consider the next simple grid of 4 charge points on a 40A grid connection. Without load balancing each charge point can only use up to 10A without risk of blowing up a fuse.

Installation Steps
- Connect all charge stations to an Ethernet switch
- The first step is to make sure all the charge points are connected to Ethernet to a single switch. This switch can be part of the existing network infrastructure, or it can be a new stand-alone switch.
- Place Edge and connect to the Ethernet switch
- The next step is to place the Edge. The recommended place is indoors close to the energy meter and with access to the Ethernet network. Then power the Edge with a 12VDC 2A Din-rail power supply or a DC connector with an adapter (See section Edge Hardware Connectors IO). Finally connect the Edge to the switch using an RJ45 Ethernet cable.

- Connect Edge to the internet via GSM router or local network
- The final step in completing the basic installation is to make sure it has internet access. This can be done with a GSM router or by using the existing network infrastructure (preferred)
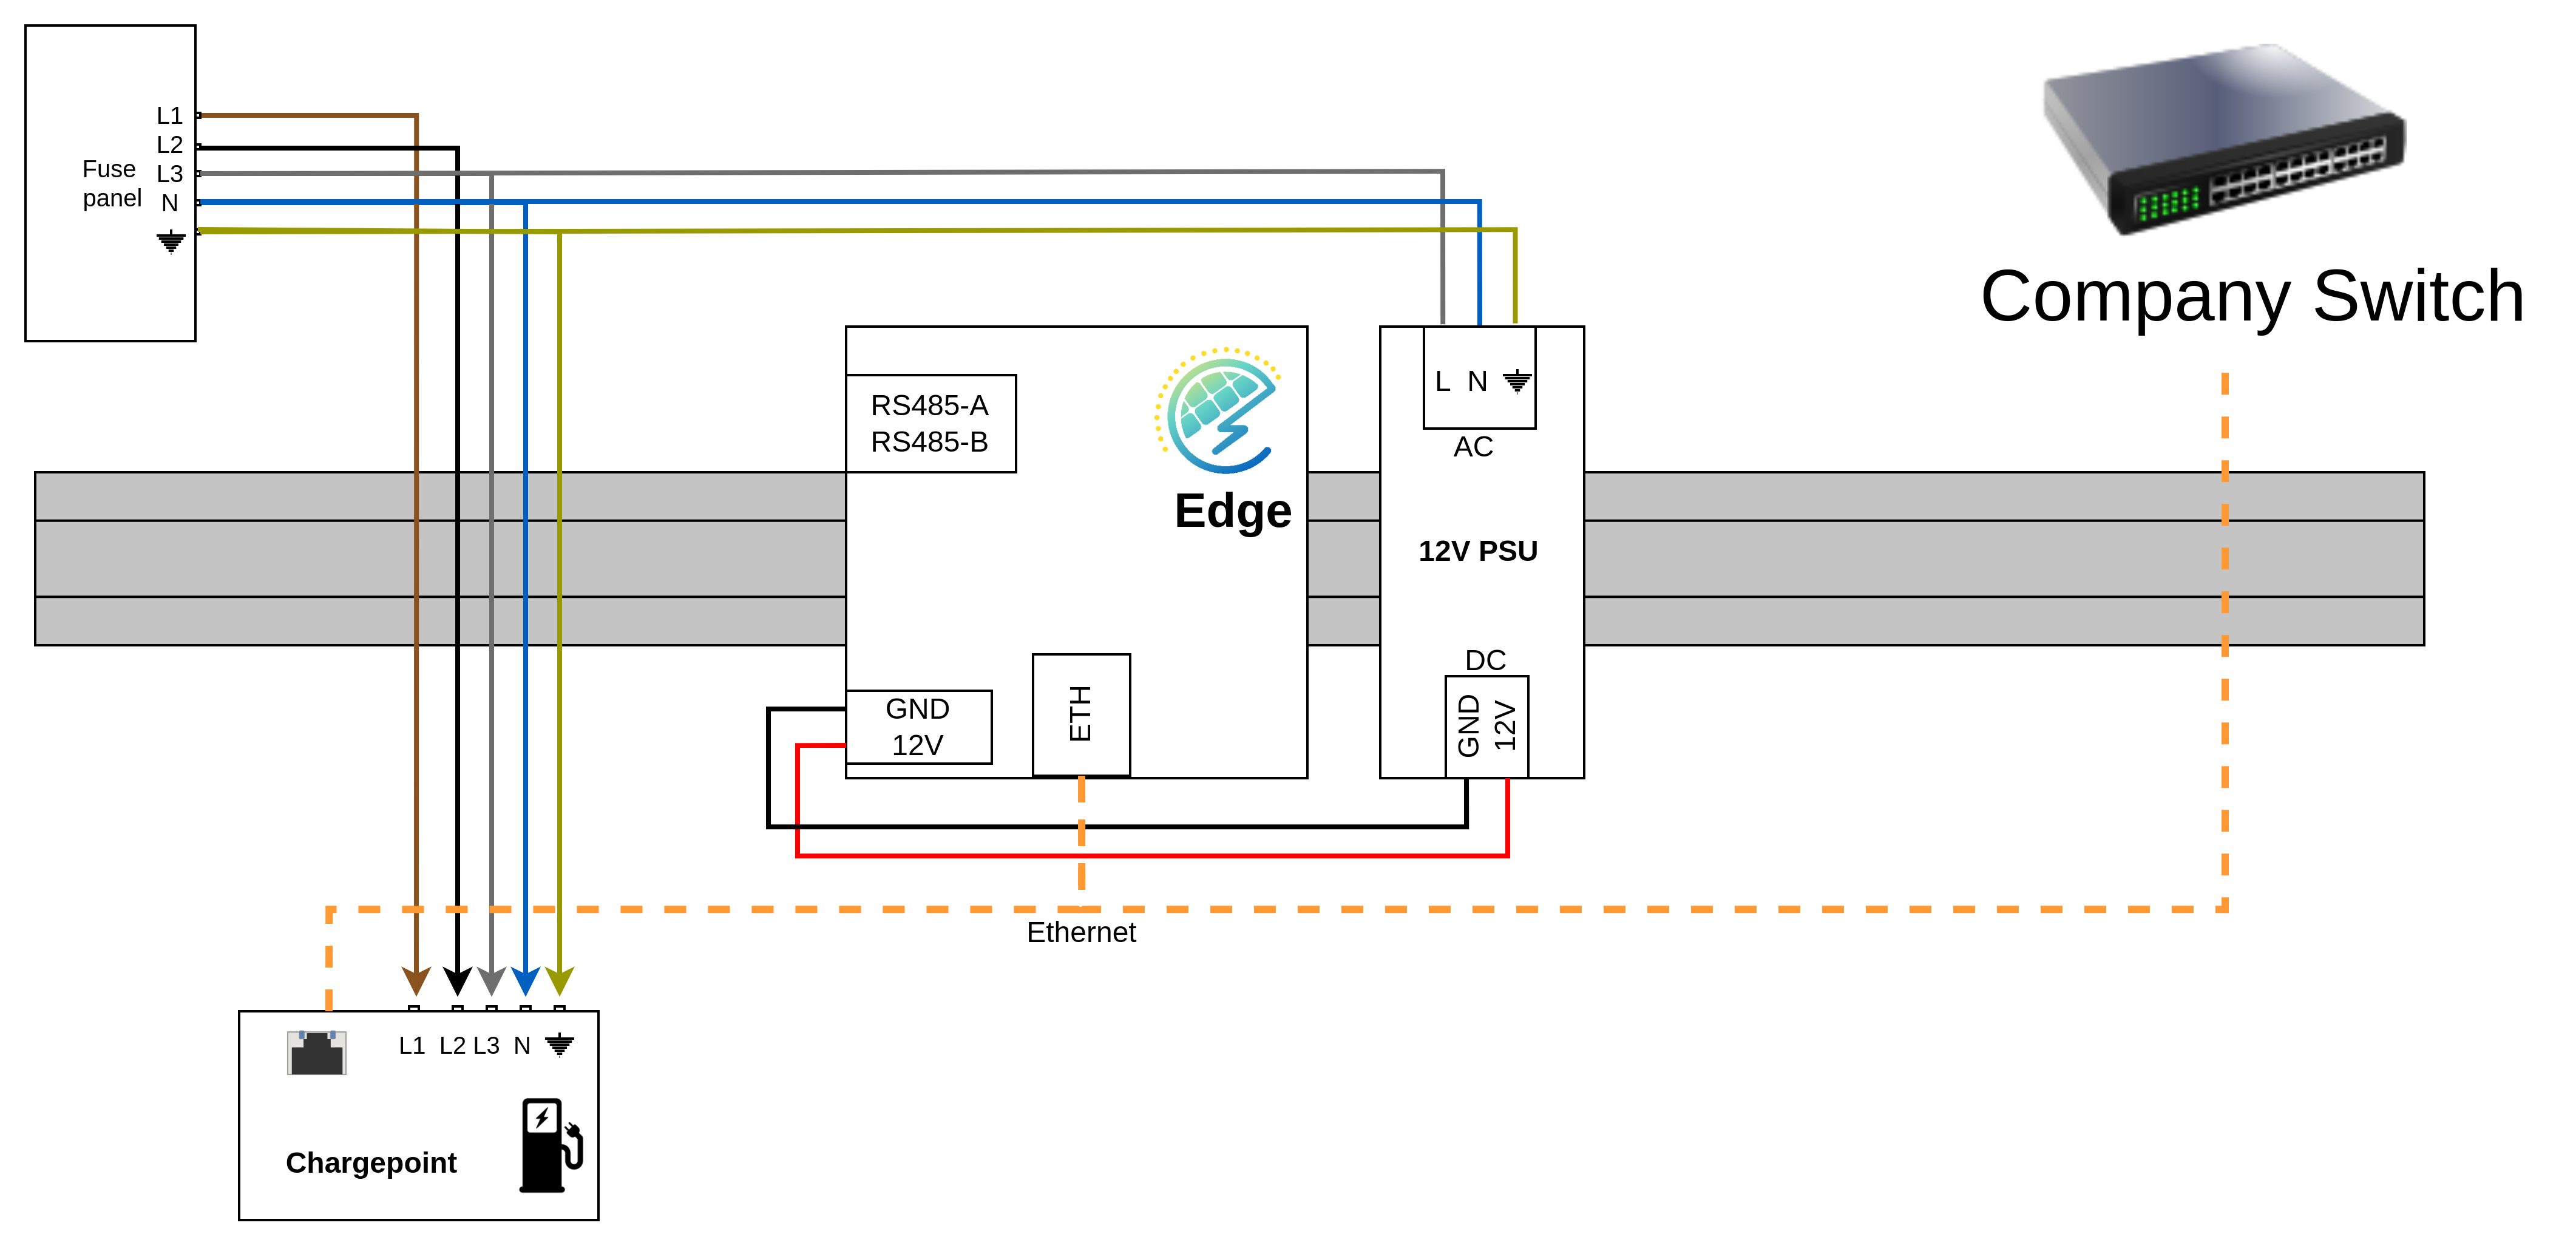
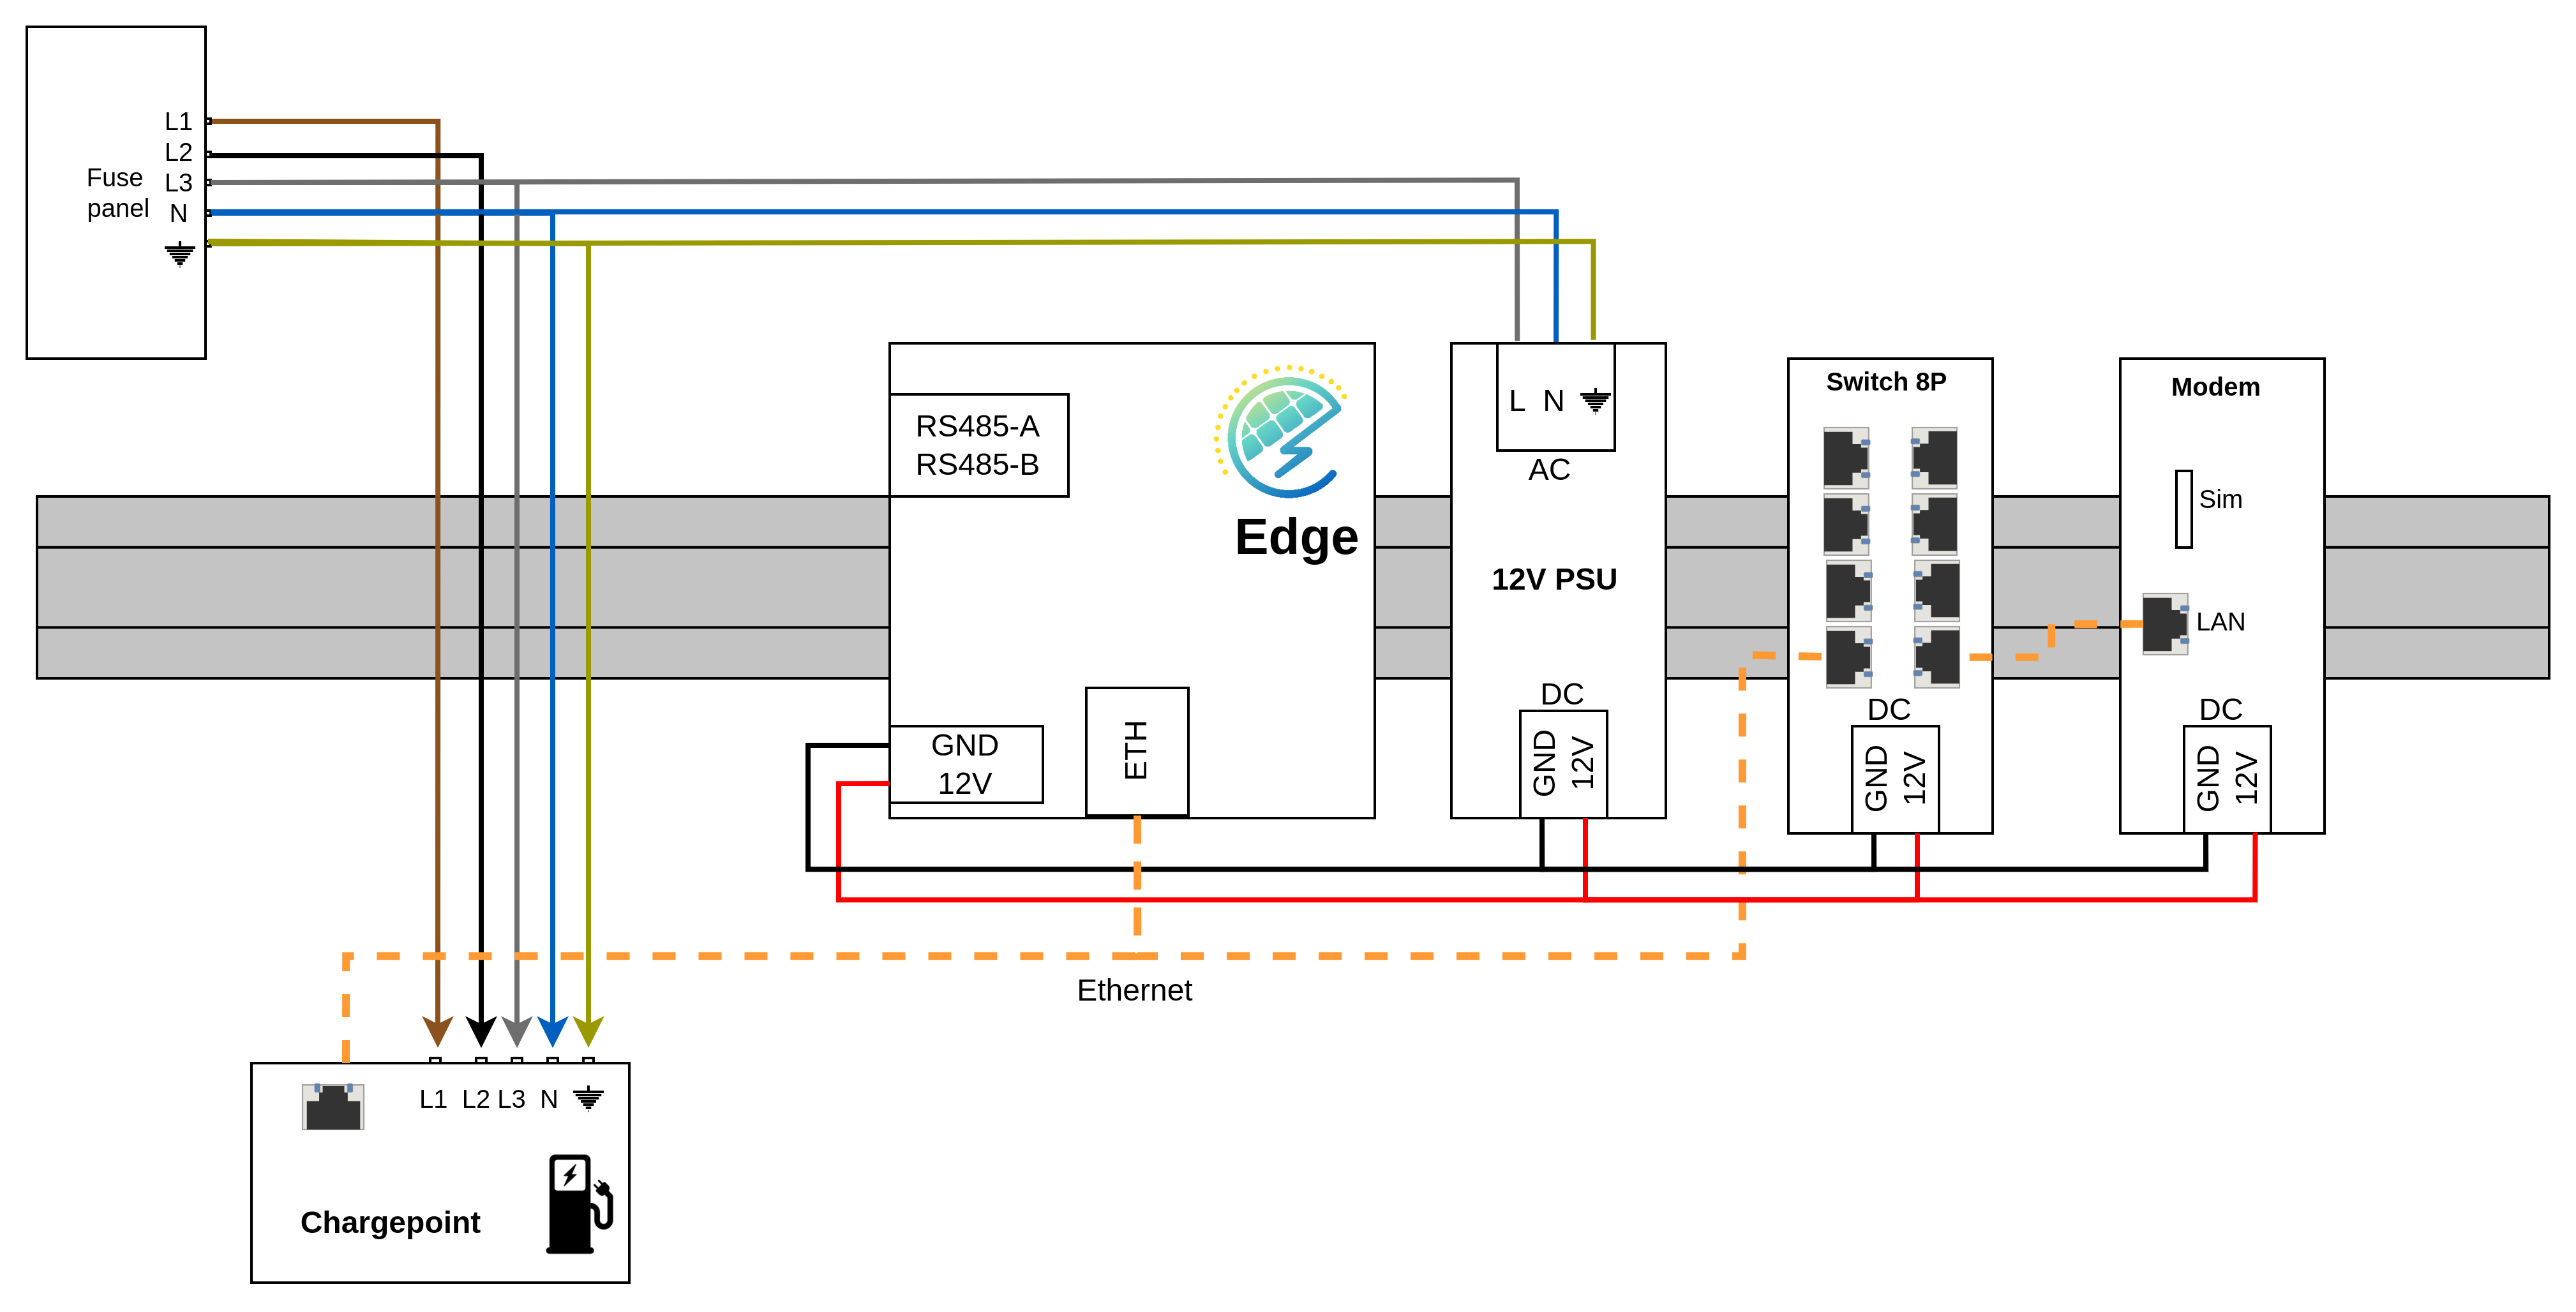
Reference schematics
Note: Reference schematics of an installation with an Energy meter can be found in the setup guides: Energymeter Installation
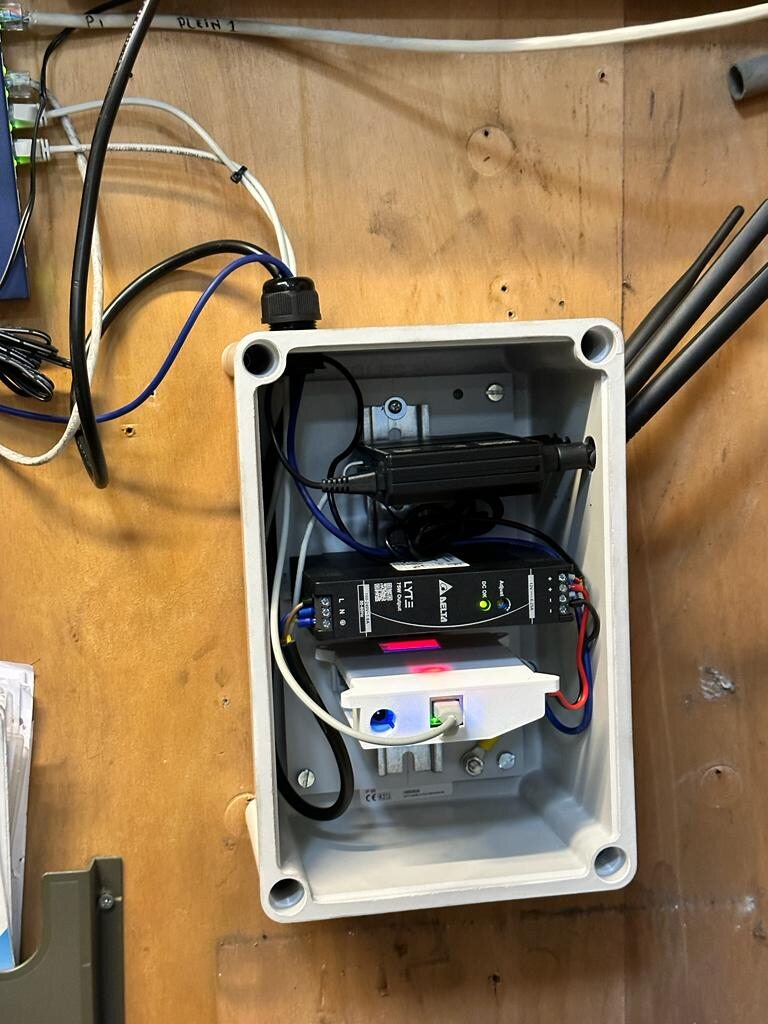
Visual Reference
Use the following picture as a Indication. Every installation will have it’s own requirements. In the following image. The Edge is mouted on a din-rail along with a power supply and a GSM modem. The energymeter and switch are mounted outside of the frame